Spending all day, every day at home has been great, except that I have so many ideas and goals (and so little self-discipline to accomplish them all!). I have come to consider myself somewhat of a "Jack of all trades". I dabble in a lot of areas, but am not GREAT at any one thing. I guess I will consider this time a 'make it until you find it' moment of my life... Meaning, I will do a lot of things until I find the thing that really gets me going, and I will work on becoming really good at that.
This started as a piece of artwork I had gotten for our TN house, but now that we have moved, the colors didn't really fit with our new scheme, so I decided to paint the 'G' white to maybe match my office. But...... I felt like the white was TOO white next to the vintage yellow, and so I didn't like it, really.
THEN, I saw this thing on Pinterest about "quilling". It's a paper technique that is super easy and looks really cool! I pretty much just looked at one instruction page and created this. It is definitely not the greatest, and it is DEFINITELY not gonna last considering I used the wet paint and a glue stick to apply the paper.
Result: The technique is really cool and I loved it... But... I still don't really love this piece itself. Needless to say, I ended up throwing it away. *GASP* It was fun, but I wasn't about to be hanging it up anywhere, so....
On the other hand, I DO love this craft project that D helped me bring to life! I saw something like this on Pinterest, and I decided to make it my own. I originally thought I could use scrapbook paper in the frames, but I couldn't find any that fit my color scheme, so I resorted to fabric. I found some great pieces that I loved and put them in 5x5 frames. The OCD side of me could not handle the stress of actually hanging them up on the wall. Fortunately, I have a way more patient husband who was sweet enough to let me leave the room and put my mind at ease while he plotted out the grid and hung them! This is my favorite part of the room!
This is my second favorite, though it is not at all what I will want it to be eventually. For now, it holds all my treasures and it's functional, so.... yeah. The best thing is that I created this entertainment center-like structure from two black shelves, a TV stand, and a black board on top to connect them all!
P.S. Does anyone notice my stack of Harry Potter books with an owl and the Elder Wand?!
(*love*)
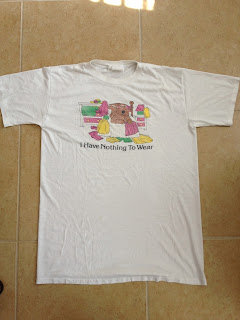
This project was my favorite! I LOVE how it turned out :) My mom will appreciate this (I hope) because this was her shirt that I took forever ago when she didn't want it anymore. I loved how it was incredibly soft, and I used it as a night shirt. Well, I still love the shirt, but I never wear it because, well, it's too big for a T-shirt, and it's not... ya know... shmexy enough to wear to bed! (Is that too awkward to say? Well, too late.) So anyway, I looked up tutorials on how to turn it into a racerback tank.
1: Cut off sleeves, neck, and bottom seam. Create the shape you want with the scoop neck and how thick you want the straps. Make a V on the back.
2: Take the bottom seam you cut off and STREEEEEEETCH it out!
3: Tie a double knot towards the top of the V and wrap, wrap, wrap it around and knot at the bottom.
4: Create high-low effect by turning shirt to the side and cutting at an angle. Start and end the cut in more of a straight line than an angle or else you end up with arrows... and that's always awkward. (Found that out the hard way!)
5: Put it on! (With something underneath, duh... Otherwise, that's inappropriate, young lady!)
6: Get your husband to take a picture of the back since you can't quite stretch that way on your own!
Basically, I love it, and I can totally wear my mom's old shirt way more often! D said it looks "dancery". I'll take it =)


No comments:
Post a Comment